Thursday, June 14, 2012

celebration decoration...

I've been thinking how I missed out on posting a few celebrations that I decorated shortly before I got back into blogging.  One was Luka's "Go Fish" themed 1st birthday party (I'll do a separate post for that), and the others were my lemon themed 30th and a red & white Christmas eve dinner party I hosted for my family.  So here is a wee recap.....


My 30th was at the gorgeous Lily Pad Cafe on Kaipaki Road in Cambridge.  Kate and the team were fabulous and let me help design my own menu and special birthday cocktail (a moscow mule!).   They were more than happy for me to decorate and add my own touches.  It was such a stunning summer night and the garden al fresco setting was just perfect!  My lovely Mother-in-law made my lemon/coconut birthday cake which was absolutely delicious! She also supplied all the gorgeous white hydrangeas from her garden.  My equally lovely sister-in-law picked me mountains of lemons from her tree and I turned them into place settings using some raffia and double sided tape.   I whipped up a little birthday sign for above the cake table using old fashioned doilies which are such a great thing to have on hand for some super cute decorations.   I saw the idea somewhere in blog land a while ago to have a jar of cookies and milk bottle lollies for some 'milk & cookies' to have after dessert with coffee and cake.  I was so happy to find a supplier of single coloured jellybeans on the internet so I could add another pop of yellow!  Lanterns hanging from the grapevines was a really simple way to make the night special thanks to a mix from dots n spots and spotlight.  I hired the very cool pewter charger plates from the lovely ladies at Blakes hire company.  Such a lovely night - lemony perfection!


This is the invite I designed .  My 30 favourite things at 30.  I quite like having one on the fridge and I ponder how different the list might be by my 40th :)


We hosted Christmas Eve dinner outside as we were cooking in the woodfired pizza oven that my very clever hubby made (see more on his website Line & Design).  I wanted a fun table for the kids to enjoy too.  I used lanterns, straws, goodie boxes and mini wreaths from dots n spots.  I came up with an idea to use the wreaths as napkins rings - they just squeezed on and looked very cute.  I made some Christmas truffles for the goodie boxes but forgot to make a batch without rum for the kids so they got some snowballs instead.  I always pull out my charger plates for special dinners.  These charger plates are actually platters that were on special at briscoes one day for super cheap.  I nabbed 10 of them because I knew they would make great chargers.  Chargers are such an easy way to add that bit of special.  It was a great dinner and great night (followed by a very exhausting effort to get the new trampoline and playhouse positioned in the dark while the kids slept!!!!!!! especially when the tractor ran out of diesel half way through the trip carting the playhouse from the shed to the house and had to be bled arggggggggggggh)!! ohwell thats what Christmas is all about 10% drama.


Olivia

Friday, June 8, 2012

Office Renovation - Part 1

Our office used to be a total bomb site.  For years we had the hugest computer desk that we picked up at the salvation army for $10 (it was clearly made in an era when computers were made bigger than me).  Basically the room was chaos.  After I got a sewing machine for Christmas I decided the room was getting a makeover and going to be functional as both an office and craft room.  I had an idea that we should build our own desk to make the most out of the room dimensions.  Kent had the idea that the opposite side of the room should be head to toe custom bookshelves.  So far the desk is made and installed but the shelves are in the shed still only half painted.  So we are getting there slowly and in the meantime I thought i'd share a few snippets of the things i've done so far (thanks to pinterest for so much inspiration!!)....


I got the idea ages ago for using individual clipboards rather than one big pinboard (sorry no idea which blog it came from back in the day - but there are lots on pinterest now anyway).  I covered mine with some fabrics from spotlight.  I attached them to the wall with 3M picture hanging strips.  They are these great little strips with little tiny fungi looking thingys that lock into eachother - super easy!

I love the yellow lamp I got from the warehouse.  I found it in a mailer and then had to search about 5 warehouses until I got my hand on the lucky last!! yah.  The frames are from the warehouse and a bargain at about $12 each.  The first frame has a print I bought at kikki k - LOVE that quote.  The second print I made myself (gosh hope I'm not guilty of copyright infringement because I know I've seen similar prints on etsy - but I did just come up with this mix while playing around).  The third frame is one of Mila's first paintings she came home with from babyschool.  It was so hard to choose which one to frame - I'm such a hoarder even keeping post-it notes and serviettes she has scribbled on! I have lots framed in one big frame in her room that used to be a mirror of my sisters that broke.  Its quite convenient not having glass because I'll be able to easily change and update them.


My husband Kent is fishing MAD so I knew he would happily sit and work around lots of fish! I made the keep calm sign using a special website and used fabric for the background.  I recovered the old office chair with more spotlight fabric.  This was surprisingly easy.  The chair had a plastic edging that isn't glued hard in place its just sits there so I had room to tuck the new fabric in.  I used a thin paintbrush to twist and tuck the fabric in.  I covered our old pinboard with this very cool spotlight fish fabric and hung it under the 13 pound 2 oz salmon that Kent caught in the Wanganui River when he was 11 :)

I'll post more as the renovation progresses...

Olivia

Tuesday, May 15, 2012

a very mint Mother's Day ...


Mint is one of my favourite things.  It is my favourite 'anything sweet' flavour (especially especially mint gelato), is my favourite herb (smashed up with garlic, lemon juice & olive oil I add it to almost everything I eat), is a main ingredient in my favourite drink (MOJITO!) and lately is also my favourite colour (just writing this is making me wonder why I had a lemon themed 30th?) ... soooooo seeing as my love of mint comes from my Mum I thought it was the perfect theme for a Mother's Day celebration this year.  My mum is about to head off to Europe with my Dad on her first ever proper OE and seeing as we won't be seeing her for 3 months I thought we should make Mother's Day a special treat ...


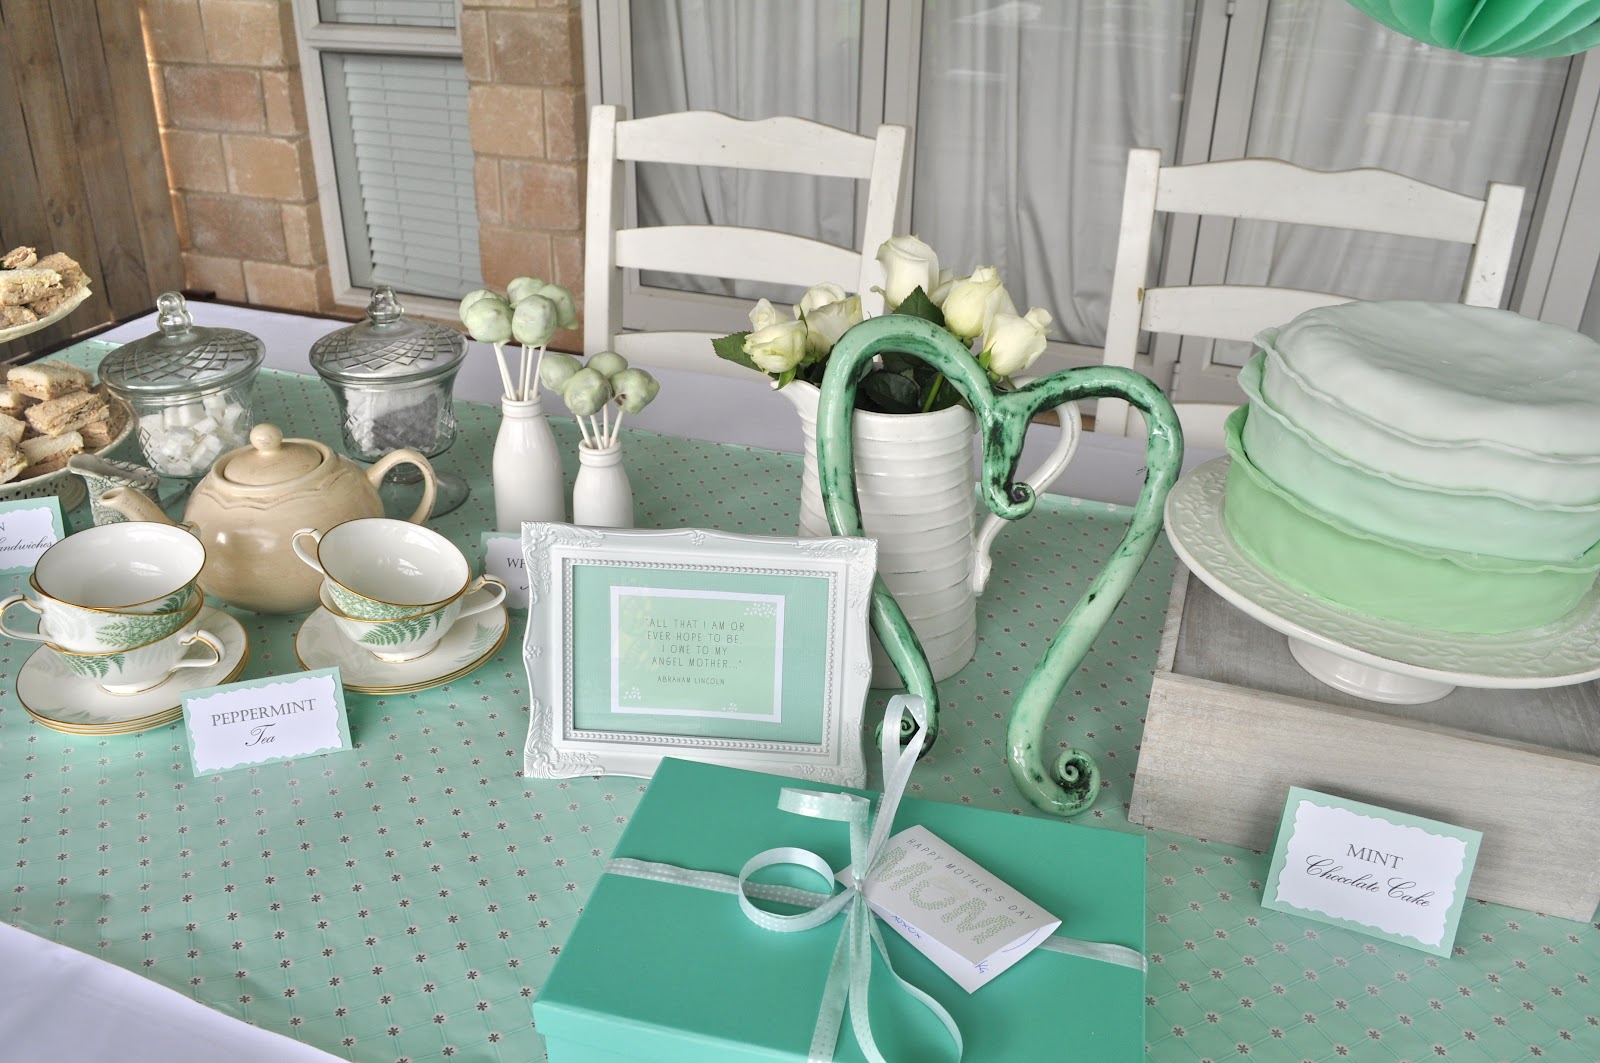
In my last post I mentioned some free printables that I wanted to work into my table.  Well of course I ran out of time but I did manage to incorporate this lovely quote by placing it against a mint coloured card background.  I also used the card printable for my Mum's card (had to get the twink out for a quick change from Mom to Mum)


My first ever attempt at macarons.  I can see why they have the reputation that they do.  You need your ingredients to be optimal and preferably should avoid having two small children hanging off you while you make them!  I opted for using the NZ masterchef recipe and also used tips from here.  I think my downfall was not aging my eggwhites long enough, not having fine enough ground almonds and also I'm dubious as to whether the recipe should be mls rather than grams for the egg white measurement (not sure what difference it would make but I don't think there was enough egg white to get the consistency needed - my mix was too stiff therefore I couldn't avoid leaving the wee tip shape from the piping bag.  However, I did try experimenting with some leftover mixture and added more whites but too many I think and the result was pancakes - which you can see below I turned into some little towers layered with ganache and topped with mint buttercream).  All in all I was pretty happy and I thought they tasted delicious!! The white chocolate ganache filling is really yum :) (I'm just updating this post because I've just noticed that Bella Cupcakes (the most clever baker with the most beautiful blog!) has been on a journey to master the Macaron and she has narrowed down the best recipe and technique - wish I'd seen this earlier!!)


Loving my new Dotsnspots drinks dispenser filled with mint lemonade.


I made these mint truffles by blitzing 2 packets of mint slice biscuits in the blender and adding some white chocolate ganache to get a rollable consistency.  After freezing them I dipped them in mint coloured white chocolate - YUMMO.


I decided I wanted to make a fondant ruffle cake but I knew I would never find the time to make a beautiful tower with a trillion ruffle layers so I aimed small (well what I thought was aiming small).  I saw a photo of a beautiful cake that had more of a blunt cut fondant layering and I thought I would try that and add an ombre twist aswell (I love ALL things ombre).  Well at 10pm at night it was all getting two difficult so I when I realised I couldn't replicate the photo I just went simple.  I think the finished product is still quite pretty.  I'm not sure why it is though that every time I make a cake I swear I'm going to take the time to level the top and do all the things necessary to get a flawless finish but instead once again I didn't bother and sin of all sins I iced it still a bit hot!!!! I think it was the washing machine and dishwasher screaming at me to attend to them that distracted me.  Oh well there is always next time.  I'll post the recipe for the insanely good cake below.


Perfect honeycomb balls from Dotsnspots!


This M comes from the 'Mila' sign I have in her bedroom.  It was the perfect addition for a Mint party all about celebrating Mums.


 I love making food labels.  Its nice hosting a party for adults simply for these little touches.  I never bother with kiddies parties because I know they aren't read.  I made these using card and craft scissors I got at spotlight.  These pretty tea cups I picked up for free at a neighbourhood swap party (thanks for the invite Jade!!).  So cool how one person's trash is another person's treasure - such a pity I forgot I had a matching teapot and didn't put it out.  My mint coloured table runner is a roll of wrapping paper :)


 I love mint in savoury food aswell.  We had mini chicken sandwiches with mint aioli....


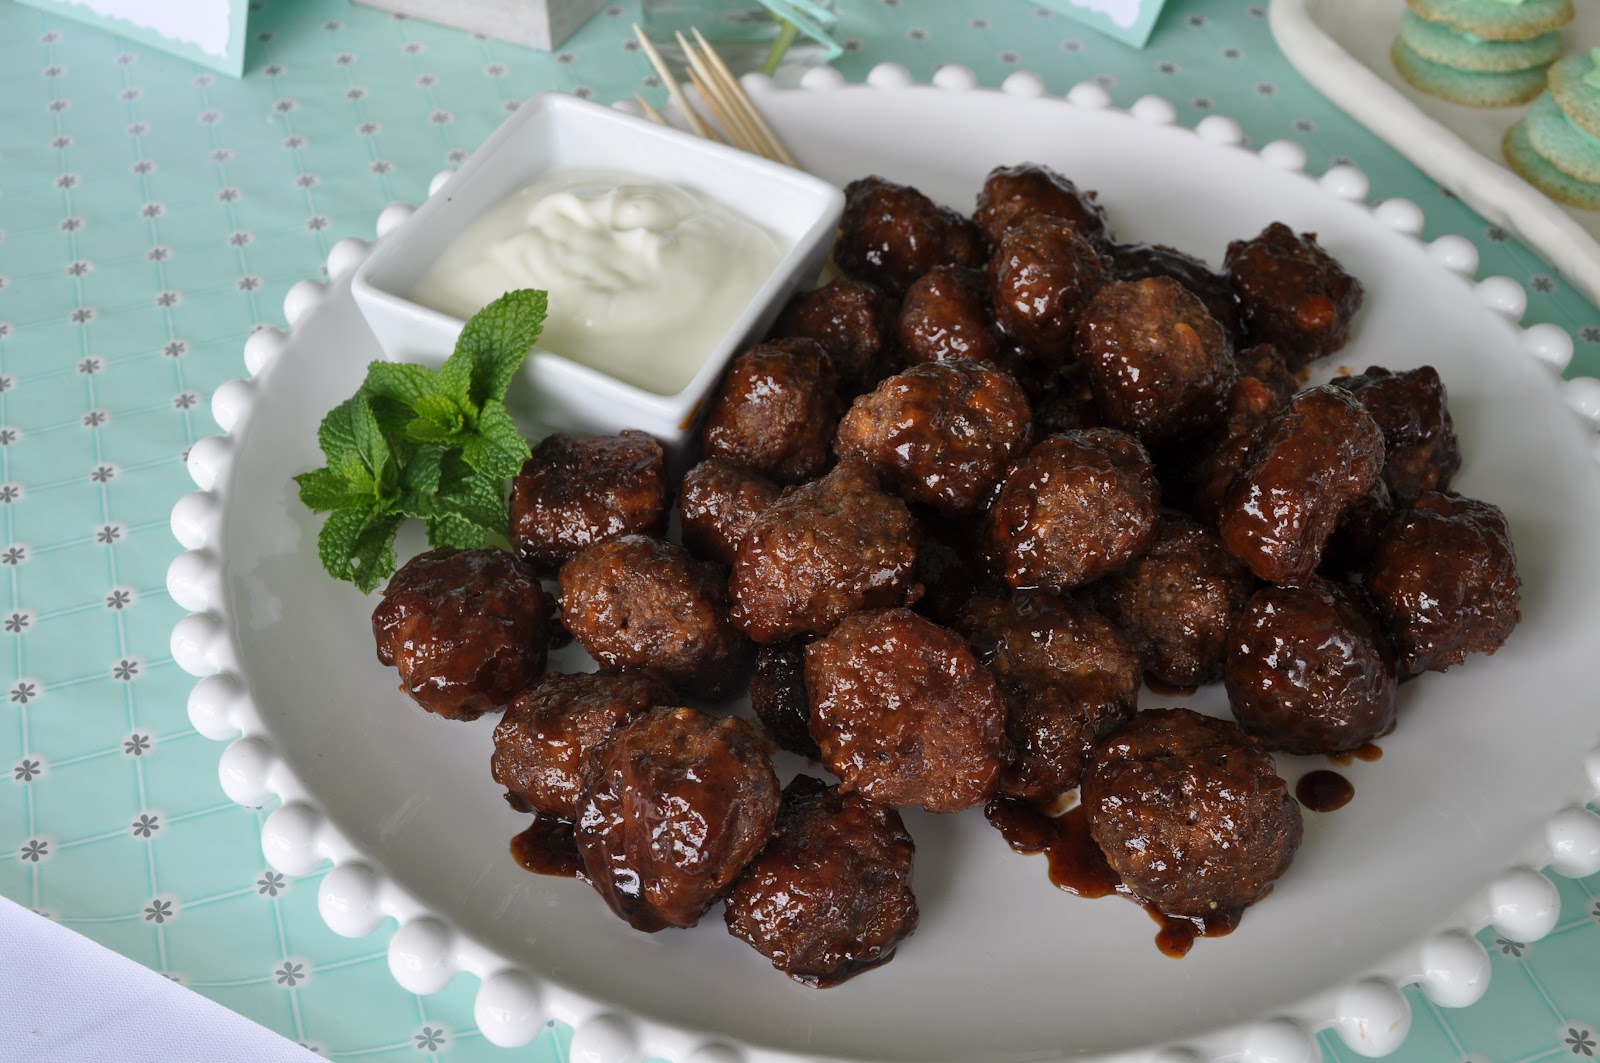
Lamb mint meatballs with yoghurt dipping sauce....


Pork, prawn & mint vermicilli salad boats ....


 Roast beetroot, feta & mint dip with ciabatta.


 This wasn't planned for the menu but Dad turned up with his home hot smoked salmon (amongst other dishes).  This salmon is insanely good !!!!!!!


This cake was so yum.  If you love mint and chocolate you will love it !!!  I've been meaning to share my favourite chocolate cake recipe, all I did was mintify it a bit.  This recipe came from a friend of mine who originally got it from another friend's mother who got it from her friend and .......my knowledge of the recipe chain ends there.  You know a recipe is good when it travels (I have made some small changes though).


1 cup of made up espresso or instant coffee (recommend de-caf for kids cake)
1.5 cups of standard flour
1 tsp baking powder
1 tsp baking soda
1 tsp vanilla essence
2 large eggs
1.5 cups of sugar
½ cup cocoa
125g butter
1 cup of plain yoghurt
to make it mint omit the vanilla essence and instead add 1 tsp of peppermint essence, add 3/4 of a large block of whittakers peppermint / dark chocolate.

Make up the coffee and let it cool a little.  Put all dry ingredients into a bowl and mix to combine.

Melt the butter and add the vanilla (or peppermint), coffee and yoghurt.

Break the eggs into the dry ingredients and mix a bit.  Add liquids and mix till just combined.

Melt the peppermint chocolate in the microwave and then add to the cake mixture by gently folding it in.

Bake in a lined 22cm round tin at 160 degrees for 40 min or until skewer comes out clean.  Cool in tin for 10 min then cool on a rack.

This is the standard recipe for a rather standard size cake.  I always at least 1.5 times  or double the recipe for a nice high cake, then when it is cool I split the cake horizontally and add a layer of butter cream icing in the middle, before icing the entire cake. It makes it that much more moist and delicious!!  for my cake above I actually went 2.5 times the recipe and then split it into 2 20cm tins for a smaller higher cake.

Such a long post!!  

Olivia :)

Thursday, May 3, 2012

Mint + Mum

I'm planning a very minty Mother's Day this year.  Just sharing some inspiration ..........


Wanted to also share the link to these gorgeous free printables that I found:


They have been put to use in a gorgeous Mother's Day breakfast, see below (may have to show my husband this to give him some ideas for how breakfast in bed is done - although having said that he does make me great french toast!).  I'm going to use these printables in my family Mother's Day morning / afternoon tea (not quite decided just yet)  (may have to get some twink out though and change a few Moms to Mums).


Top images sourced from:

Thursday, April 26, 2012

For Chace - Makeup Fundraiser Night


If I could redefine the word courage it would be Chace Topperwien and his family.   His parents are my heroes.   You can find out more about Chace through his facebook page.  I have followed his story (right back from the terribly unfortunate incident of his mistaken immunisation) as he is almost the exact age as my daughter Mila and it touched my heart back then.  To learn of his cancer was heartwrenching.

When I heard about their plight to the UK, I knew I wanted to do something to help raise what I could.  I entertained a few ideas but when my sister said she would like to help I thought why not just combine whatever talents we have.  She is a fantastic makeup artist (follow her on facebook) and while I'm on continued hiatus from being a lawyer I like to throw a party.

So throw a party we did.  It was a makeup demonstration night.  I themed it "What hue suits you?" (for anyone who doesn't know what "hue" means it is shade or tint.  According to my family this is not a word but according to me and the dictionary it is!!).  I went with a theme of pinks, reds & fushias teamed up against browns, caramels & golds to represent the most common makeup "hues!!".

I loved every minute of putting together the sweet treats table knowing this would be going towards such a great cause.  All attendees paid $30.  We also had a couple of silent auctions.  My parents auctioned a weekend for 4 their beach house accommodation and my mother in law donated some gorgeous jewellery from her very super cool Garden Art Studio.

At the end of the night all the sweet treats not eaten were bagged up for sale (coin donations).  It cleared the table and brought in lots more cash.  We raised almost $1300 in total.

I'd like to thank Denise at Dots n Spots for donating for the cause some lovely bits of party ware.  Also Alison Worth of Locavore (fine foods) for donating some lovely quince paste to be added to the sweets sale (they sell through the Saturday morning Cambridge markets).


I learnt to make these tissue pom poms from a Martha Stewart Tutorial found through the insanely gorgeous blog of Bella Cupcakes.  


My CRAZY good rocky road invention.  Cadbury milk chocolate & cooking melts mixed and melted, caramel marshmellows, honey roasted peanuts, hokey pokey and crushed homemade ricie slice.  


I don't rate the recipe I used for this red velvet cake.  I will try and conquer that cake another time.


I trialled a new piping technique for my buttercream icing.  Its not really what I was after but I was in a rush and still think the mini rosette was very cute.  I did this with a 1M tip but was recommended a 2D tip but couldn't find one for sale.  Bella Cupcakes has a great tutorial :)


Very cool dots n spots drinks dispenser.


I use my favourite ever chocolate cake recipe for these cupcakes.  I promise to separately blog the recipe along with the icing recipe.


Some of the volunteer models :)


All the scrummy goods going home with guests for $$$!!

The invite / flyer


Me and my Mum.  She was a model for the makeup and only has one eye made up with false lashes.  Love this photo :)  Love ya Mum.


Thanks to everyone who helped and came and supported.  All my love and well wishes go to Chace and family xoxoxox